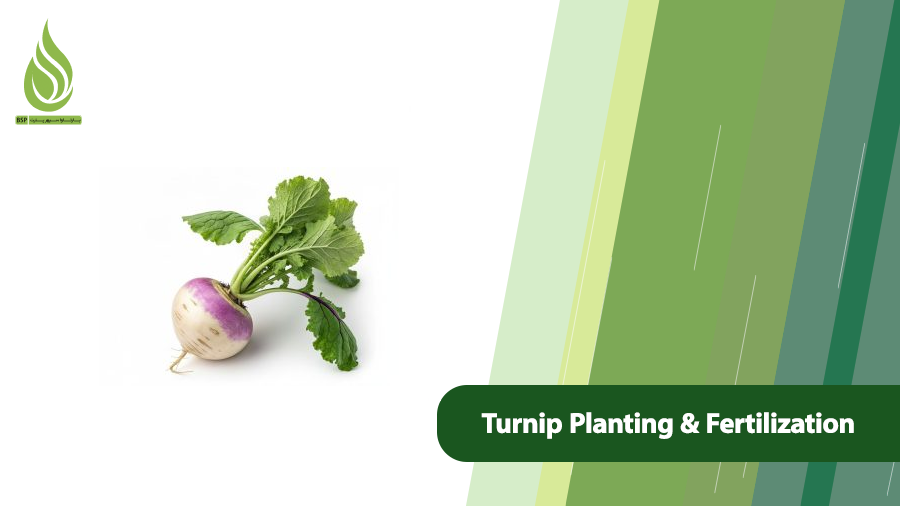
Turnip Planting and Fertilization Guide
Turnips are one of the most widely consumed root vegetables, grown in home gardens and commercial fields across many regions. Prized for their rapid growth, wide adaptability, and impressive nutritional profile, turnips offer both tasty roots and vitamin-rich leafy greens. Whether you’re planting a small backyard patch or managing several acres, understanding the fundamentals of turnip planting and fertilization is the key to a successful, high-quality harvest.
In this comprehensive guide, we’ll walk through everything you need to know: the characteristics of the turnip plant, ideal growing conditions, step-by-step planting instructions, a full season fertilization schedule, and proper harvest and storage techniques. You’ll also learn how targeted nutrition can correct soil problems and dramatically improve root size, flavor, and yield.
Turnip Characteristics: A Fast, Cold-Hardy Root Crop
Turnip (Brassica rapa) belongs to the Brassicaceae family, alongside cabbage, broccoli, and kale. It’s a versatile plant: both the swollen taproot and the leafy tops are edible and highly nutritious. The roots provide vitamin C, fiber, and minerals, while the greens are packed with vitamins A, K, and folate.
Key features of the turnip plant include:
- High nutritional value in both root and leaf.
- Fast growth cycle: many varieties mature in just 40 to 60 days from seeding.
- Cold tolerance: turnips thrive in cool weather and can withstand light frosts. In fact, a touch of frost often improves root sweetness. Avoid growing turnips in hot, humid conditions, as heat causes roots to become woody, tough, and overly pungent.
- Flexibility: turnips can be grown in open fields, raised beds, and even deep containers.
- Variety diversity: common varieties include ‘Purple Top White Globe’, ‘Hakurei’ (a sweet salad type), ‘Just Right’, and ‘White Lady’. Each offers slightly different maturation times, root shapes, and flavor profiles.

Ideal Growing Conditions for Turnips
Achieving the best results starts with choosing and preparing the right environment for your crop. Turnips are relatively forgiving, but they respond dramatically to well-managed conditions.
- Climate: Cool, mild weather produces the largest, sweetest roots. The ideal temperature for seed germination is between 60°F and 77°F (15–25°C). In cold-winter regions, plant turnips in late summer or early fall for a harvest before the ground freezes. In areas with mild winters, sow in late winter or early spring to beat the summer heat. Avoid prolonged temperatures above 80°F (27°C), which degrade quality.
- Soil: Turnips need loose, well-drained soil with a light to medium texture. Heavy clay soils or compacted ground cause forked, distorted roots and poor size. The soil must be rich in organic matter to retain moisture and supply nutrients. The optimal soil pH for turnip is slightly acidic to neutral, between 6.0 and 6.5. Outside this range, nutrient availability declines and root development suffers.
- Sunlight: Full sun is best, at least 6 to 8 hours of direct sunlight per day. In hotter regions, light afternoon shade can help protect plants from heat stress and keep the soil cooler for better root formation.
Step-by-Step Guide to Turnip Planting

Following a careful planting process sets the stage for uniform, vigorous growth and simplifies the turnip planting and fertilization plan later.
- Prepare the soil: Begin by deep-tilling or forking the soil to a depth of 10–12 inches. Remove all stones, old roots, and debris that could obstruct taproot development. Turnips demand a fine, crumbly seedbed. If your soil is heavy clay, incorporate well-rotted compost or aged manure several weeks before planting to improve soil texture and drainage. This is also the moment to address soil pH. If a soil test shows alkalinity above pH 7.0, a sulfur-containing amendment can bring it down into the ideal range, making nutrients more available.
- Create planting rows: Form shallow furrows or rows spaced 12 to 16 inches apart. Raised beds work well, especially in soils with marginal drainage.
- Sow the seeds: Turnip seeds are small and should be planted only 0.5 to 1 inch deep. Space seeds about 1 to 2 inches apart within the row. Sow densely at first, later thinning will provide the final spacing. Cover the seeds lightly with fine soil and firm the surface gently.
- Water lightly after planting: Apply a gentle, thorough watering to settle the soil around the seeds. Keep the seedbed evenly moist until germination, which typically occurs in 5 to 10 days depending on temperature. Erratic moisture at this stage leads to spotty emergence.
- Thin the seedlings: Once seedlings have developed two to three true leaves, thin them to a final spacing of 4 to 6 inches apart. This gives each root enough room to expand without competition. Crowded plants will produce small, spindly roots. Cut or pinch off the weakest seedlings at soil level rather than pulling them, to avoid disturbing the roots of the remaining plants.
- Weed control: Weeds aggressively compete for water and nutrients, especially when turnip plants are young. Hand-weed carefully near the rows to avoid damaging shallow turnip roots. A light mulch of straw or shredded leaves applied around plants after thinning will suppress weed growth, conserve moisture, and moderate soil temperature.
- Monitor for pests and diseases: Common pests include flea beetles, aphids, and cabbage root maggots. Diseases such as powdery mildew and root rot can appear in overly wet or crowded conditions. Practice crop rotation—never plant turnips or other brassicas in the same ground more than once every three years. Keep foliage as dry as possible during irrigation to discourage fungal diseases. In cases of severe pest pressure, use appropriate organic or conventional controls, always following label instructions.
- Break surface crust: In clay-rich soils, a hard crust can form after rain or watering. Gently break it up with a hoe or hand tool to allow oxygen to reach the roots and seedlings to emerge easily.
Turnip Fertilization Program: A Stage-by-Stage Schedule

Effective turnip planting and fertilization isn’t about a single application; it’s about delivering the right nutrients at the right growth stage. Below is a proven schedule that balances organic soil building with targeted mineral nutrition.
Pre-Planting Fertilization
Before planting, prepare the soil by working well-rotted compost or aged manure (2–3 pounds per square yard) into the top 6 inches about 20–30 days ahead to boost microbial activity, improve structure, and slowly release nitrogen; incorporate a phosphorus source like superphosphate or bone meal according to a soil test to support vigorous root growth; and in alkaline soils—common in many regions—apply a sulfur-containing fertilizer such as ammonium sulfate (21% nitrogen, 24% sulfur) to gradually lower pH and unlock tied-up phosphorus, iron, and zinc.
Early Growth (2–3 Weeks After Emergence)
During the vegetative stage when leaf expansion and root initiation are underway, focus on nitrogen for green growth along with phosphorus and micronutrients: apply a balanced fertilizer or nitrogen-phosphorus blend, using a light side-dressing of ammonium sulfate to supply steady nitrogen without triggering excessive leaf growth at the expense of root development, and supplement with a foliar spray containing iron, boron, and other trace elements to improve leaf greenness, enhance photosynthesis, and boost disease resistance—boron is especially critical for healthy root tip development and helps prevent hollow heart or corky tissue later.
Mid-Growth (Around 40 Days After Sowing)
As the roots begin to swell and nutrient demand shifts from foliage to the storage organ, potassium becomes the driver of sugar translocation and root expansion—apply potassium sulfate or potassium nitrate as a side-dress or through drip irrigation to produce larger, sweeter turnips—while continuing to supply boron and manganese via fertigation or foliar spray for smooth, dense root texture; at this stage, stop nitrogen applications entirely, since excess nitrogen will fuel leaf growth instead of bulking roots and can leave a bitter taste.
A Critical Note on Fertilizer Management
Both under-fertilizing and over-fertilizing harm your turnip crop. The only way to know exactly what your soil needs is to take a soil sample before planting and send it to a laboratory for analysis. The results will show the pH, organic matter level, and the available concentrations of nitrogen, phosphorus, potassium, and micronutrients. With this data, you can fine-tune your turnip planting and fertilization plan, avoid wasteful applications, correct pH problems, and produce consistently high-quality roots year after year.
Harvesting and Storing Turnips

Knowing when and how to harvest is just as important as turnip planting and fertilization. Turnip maturity varies by variety: early types are ready in 40–50 days, while main-season varieties take 60–70 days. The ideal harvest window is when roots reach 2 to 4 inches in diameter—about the size of a tennis ball. Roots left in the ground too long become fibrous, woody, and strongly flavored.
To check readiness, gently press the top of the root near the soil line. It should feel firm and full, not hard and woody. For the sweetest flavor, harvest after a light frost has nipped the leaves.
Stop irrigating a few days before harvesting to allow the soil to dry slightly. This makes pulling easier and reduces mud on the roots. Use a garden fork or trowel to loosen the soil beside the row, then lift the roots carefully. Cut the leafy tops back to about 1 inch above the root crown immediately—leaving greens attached draws moisture from the root and accelerates spoilage.
For storage, turnips keep well under the right conditions. The ideal storage temperature is 32–39°F (0–4°C) with a relative humidity of 90–95%. A root cellar, cool basement, or refrigerated storage room works perfectly. Place unwashed roots in perforated plastic bags or layer them in wooden crates with slightly damp sand or sawdust. Under these conditions, turnips can remain crisp and fresh for 3–4 months. Do not store turnips near fruits that emit ethylene gas, such as apples, as this speeds up deterioration.
Putting It All Together
Successful turnip production isn’t complicated, but it does reward attention to detail. Start with a well-prepared, deep, loose soil with the right pH. Time your planting to avoid summer heat and use a thoughtful fertilization schedule that changes with crop needs—phosphorus and sulfur before planting, nitrogen and micronutrients during early growth, and potassium with micronutrients during root fill. Integrate a soil test into your yearly routine to remove the guesswork from your turnip planting and fertilization strategy.
When soil pH is too high, ammonium sulfate becomes a critical tool. It delivers immediately available nitrogen and sulfur while gently lowering pH to free up other essential nutrients. By combining these practices—proper planting, balanced fertilization, diligent pest management, and timely harvest—you’ll enjoy a bountiful crop of smooth, tender, sweet turnips. Whether they’re destined for the fresh market, the kitchen, or the root cellar, your turnips will reflect the care you put into every stage of their growth.