Seed Priming: A Professional Technique to Boost Germination
Seed priming is a professional and effective technique that can significantly increase seed germination rates. This method not only promotes more uniform and robust plant growth but also enhances root development and improves seed resistance to diseases. Let’s walk you through the steps of seed priming and introduce the best fertilizers for the process.
What is Seed Priming and Why Does It Matter?
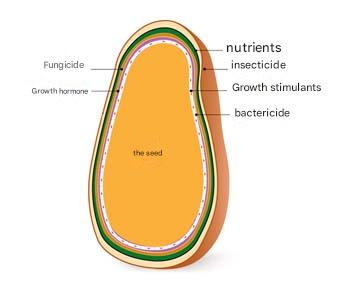
Every farmer wants to maximize seed germination and achieve a bountiful harvest. Sometimes, factors like unsuitable temperatures, compacted soil, fungal contamination, or harmful soil microorganisms prevent seeds from sprouting. Seed priming is a simple yet highly effective technique that can help you achieve a productive crop. It involves coating seeds with nutrients, fungicides, beneficial bacteria (like nitrogen fixing bacteria), or hormonal compounds before planting. This ensures seeds have better access to essential elements during the early stages of germination.
Seed priming offers several key benefits:
- Higher germination rates
- Faster sprouting
- More uniform germination
- Improved final crop yield
- Reduced fungal and bacterial contamination
- Less need for fertilizers later on
- Enhanced plant resilience to stresses (cold, drought, disease)
- Stronger root systems
- Better water and nutrient absorption due to optimal seed coating
- Healthier seedlings
While seed priming offers many advantages, it must be done correctly. Improper priming can hinder seed growth. For example, soaking seeds in a solution that’s too concentrated can lead to over-fertilization, one of the biggest fertilization mistakes in seed treatment, which may stunt germination. Let’s dive into the proper steps for seed priming next.
Which Plants Benefit from Seed Priming?
Seed priming is beneficial for most plants, but some respond particularly well to this technique. These include:
- Wheat, barley, rice
- Corn, soybeans, sunflowers
- Alfalfa, clover
- Tomatoes, cucumbers, eggplants, zucchini, lettuce, spinach, and more
- Watermelons, cantaloupes, melons
- Herbs like basil, parsley, and chives
- Tree seeds in nurseries
- Ornamental flower seeds
- Medicinal plants
- And more
What Are the Most Common Materials Used in Seed Priming?
The choice of material for seed priming depends on your specific goals. The most commonly used materials include:
| Material | Primary Use |
|---|---|
| Water | The most common medium for soaking seeds |
| Potassium permanganate | A powerful disinfectant to eliminate pathogens |
| Fungicides (e.g., Benomyl, Raxil, Captan, Thiram, Mancozeb, Elite) | Prevents rot and soil-borne fungal diseases (choose based on common fungi in your area) |
| Growth-promoting fertilizers (e.g., nitrogen, phosphorus, potassium, zinc, iron, manganese, magnesium) | Supplies essential nutrients for seedling growth |
| Biofertilizers (e.g., Azotobacter, Phosphobacteria) | Enhances soil fertility and nitrogen fixation |
| Humic acid, fulvic acid | Improves nutrient absorption and germination vigor |
| Plant extracts or growth stimulants | Boosts enzymatic activity and speeds up germination |
| Plant hormones | Accelerates germination and enhances seedling growth |
If desired, you can use NPK fertilizers, which contain nitrogen, phosphorus, and potassium, for seed priming. There are also pre-mixed fertilizers designed specifically for seed priming, making the process even easier.
What to Consider When Choosing a Seed Priming Mix?
Selecting the right seed priming mix requires attention to a few key factors. Here’s what to keep in mind:
- Understand Your Plant’s Specific Needs: Different plants require different nutrients and growth stimulants. Choose a priming mix that matches the needs of your specific crop.
- Soil Type and Environmental Conditions: Conducting a soil analysis can help identify nutrient deficiencies in your soil. Also, consider the local climate and growing conditions when selecting a priming mix.
- Composition of the Priming Mix: Essential nutrients like nitrogen, phosphorus, and potassium promote plant growth and development. The mix should include these, along with other beneficial nutrients. Some mixes contain plant hormones to speed up germination and boost growth. Ideally, the mix should combine two or three components, but not more.
- Quality of Ingredients: Ensure the priming mix is fresh and high-quality. Stick to reputable, trusted brands to guarantee reliability.
- Feedback and Experiences: Learning from the experiences of other farmers or researchers can guide you toward the best priming mix for your needs.
By keeping these factors in mind, you can select the right seed priming mix to enhance germination and improve your crop’s performance.
Steps for Seed Priming
Follow these steps to effectively prime your seeds:
- Select Seeds: Choose healthy, high-quality seeds from a reputable supplier.
- Weigh Seeds: Determine the appropriate amount of seeds based on your planting area.
- Choose a Disinfectant Solution: Use a solution like potassium permanganate or another disinfectant to treat the seeds.
- Soak Seeds: Submerge the seeds in the disinfectant solution for a few minutes to eliminate pathogens. Rinse thoroughly and dry them afterward.
- Select a Priming Mix: Choose a priming mix containing nutrient-rich fertilizers and growth stimulants suitable for your crop.
- Mix Seeds with Priming Mix: Place the seeds in a large plastic bag or container and add the priming mix. Stir or shake the seeds using a shovel or paddle to ensure even coating. (If available, use a mechanized seed priming machine for efficiency.) If using a diluted liquid mix, lightly spray it over the seeds while stirring to ensure uniform coverage.
- Dry Seeds: Spread the coated seeds in a shaded, dry area to dry, which typically takes 5 to 10 minutes. Ensure proper temperature and humidity to prevent nutrient degradation.
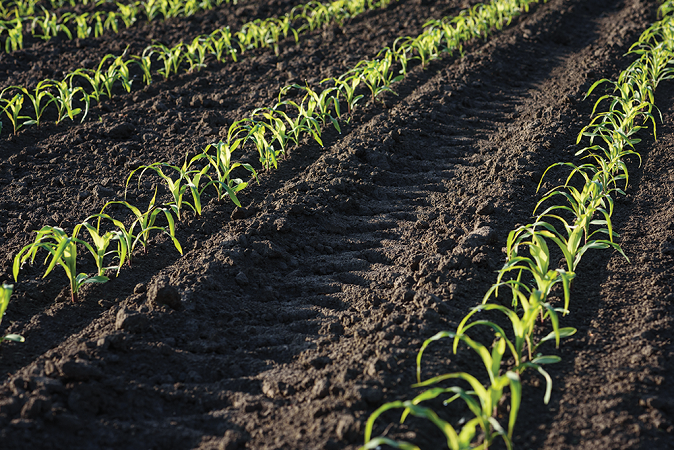
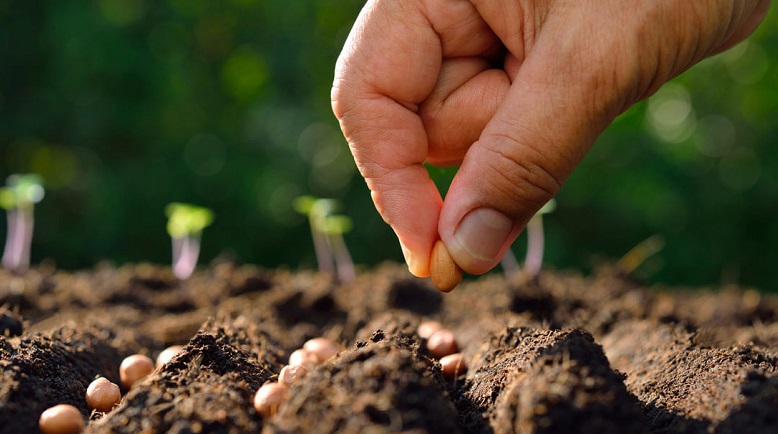
- Plant Seeds: Plant the seeds in the soil immediately after drying. The time between priming and planting should not exceed 24 hours. Sow seeds at the appropriate depth and spacing.
- Watering: After planting, water the seeds regularly and appropriately to support optimal growth conditions.
- Monitor Germination: Closely observe germination and seedling growth, making adjustments to conditions as needed.
By following these steps, you can effectively prepare your seeds for planting and promote healthier plant growth.
Common Mistakes in Seed Priming
- Over-soaking Seeds: Soaking seeds for too long can cause them to rot. Stick to the recommended soaking time.
- Using Hot Water: Hot water can damage the seed embryo. Use lukewarm water instead.
- Using Harsh Disinfectants: Strong disinfectants can kill beneficial soil bacteria. Use disinfectants at the appropriate concentration.
- Drying Seeds in Direct Sunlight: Excessive sun exposure can over-dry seeds. Dry them in a shaded area.
- Using Old or Unhealthy Seeds: Priming won’t be effective with low-quality or expired seeds.
Seed Priming Is Not a Substitute for Fertilization!
Seed priming is a simple, cost-effective, and highly practical method to boost germination rates and ensure healthy early plant growth. By selecting the right materials, following proper techniques, and avoiding common mistakes, you can take a significant step toward improving crop yield from the very start. This technique is especially valuable for farmers looking to optimize costs and maximize returns, offering an effective and low-risk tool.
However, seed priming is not a replacement for fertilization. It’s a complementary process that enhances germination quality but cannot meet the plant’s nutritional needs throughout its growth cycle. Priming provides a strong, healthy start for seeds, but it must be paired with proper nutrient management as the plant develops.
For field fertilization, conduct a soil test to guide your fertilization plan. If the soil pH is too high, adjust soil pH before planting your seeds.
Different Methods of Seed Priming
Seed priming can be done using three methods: traditional, barrel, and mechanized. Each method has its own advantages, and the best choice depends on the farmer’s needs and available equipment. Let’s explore these methods.
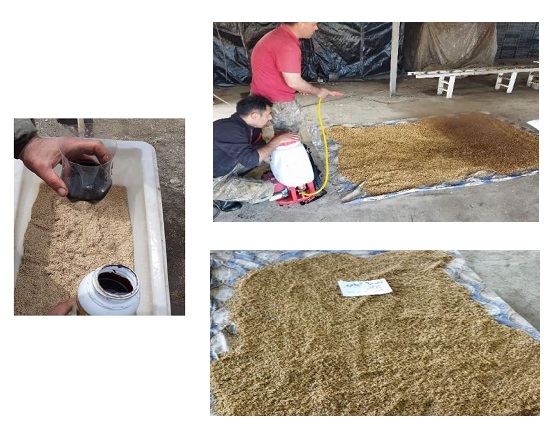
- Traditional Method: In the traditional method, farmers spread the required amount of seeds on a plastic sheet. They then add a solution of fertilizers and growth stimulants mixed with water, coating the seeds thoroughly. Farmers typically use a shovel or paddle to mix the seeds, ensuring even coverage. After mixing, the seeds are placed in a shaded area to dry for 5 to 10 minutes. It’s critical to plant the seeds in the soil immediately after drying.
- Barrel Method: In this method, seeds are placed in a barrel or mixer, and the priming fertilizer is added. The barrel is rotated to evenly coat the seeds with the fertilizer and growth stimulants. Depending on the mixer’s capacity, the seeds are mixed with a diluted fertilizer solution for uniform coverage. Once coated, the seeds are dried in a shaded area before planting. This method typically yields better results due to its consistent coating process.
- Mechanized Method: The mechanized method is the most advanced approach to seed priming. Seeds are loaded into specialized machines equipped with compartments for seeds and priming materials. During the process, the fertilizer is automatically applied to the seeds as they are sorted. This method allows farmers to prepare seeds quickly and accurately while minimizing nutrient waste. As with the other methods, the seeds must be thoroughly dried in a shaded area before planting.
Key Tips for Seed Priming
- Choose Quality Seeds: Select healthy, strong, and high-quality seeds for priming.
- Ensure Complete Coating: Make sure all parts of the seeds are thoroughly coated with the priming solution and any pesticides.
- Keep Seeds Safe: Store primed seeds out of reach of children and animals to prevent accidental poisoning. Always wear a mask and gloves when disinfecting seeds.
- Account for Plant-Specific Needs: Different plants have unique nutritional requirements. A single priming solution won’t meet the needs of all crops, so tailor the solution to the specific plant.
- Consult an Expert: Each seed type has distinct needs. Consult an agricultural expert or experienced farmer to choose the right priming mix and application rate.
- Monitor Solution Concentration: Pay close attention to the concentration and amount of the priming solution. Overly concentrated solutions can damage seeds and hinder growth.
- Maintain Proper Storage Conditions: After priming, store seeds in a cool, dry environment to preserve the integrity of the coating materials.
By following these tips, you can optimize the seed priming process for better results.